A 1960s side-split in Ancaster came to us after two consecutive springs of water pooling along the back wall of the basement, right after heavy rain. This is a walkthrough of how we diagnosed the actual entry point, why we recommended one method over the other, and what the finished result looked like.
The Problem
The homeowners had already tried sealing visible cracks themselves and running a portable dehumidifier through the wet months - neither stopped the water from returning. By the time they called, they were seeing standing water along roughly 15 feet of the rear foundation wall after any significant rainfall, with early efflorescence (the white mineral staining that means water has already been moving through the wall repeatedly) starting to show above the waterline.
The diagnosis mattered more than the fix: before recommending anything, our project manager mapped every potential entry point rather than treating the first visible sign as the whole problem.
The Diagnostic Assessment
The clay-heavy soil typical of the area was holding water against the back wall specifically, where the yard sloped slightly toward the house rather than away from it - a grading issue compounding the wall's aging condition. The existing weeping tile, installed with the home's original 1960s construction, showed clear signs of failure - consistent with most Hamilton homes built before 1980.
Why We Recommended Exterior Waterproofing
Given the failed original weeping tile and the wall's exposure to grading-related water accumulation, an interior system alone would have managed the symptom without addressing the source.
The Scope
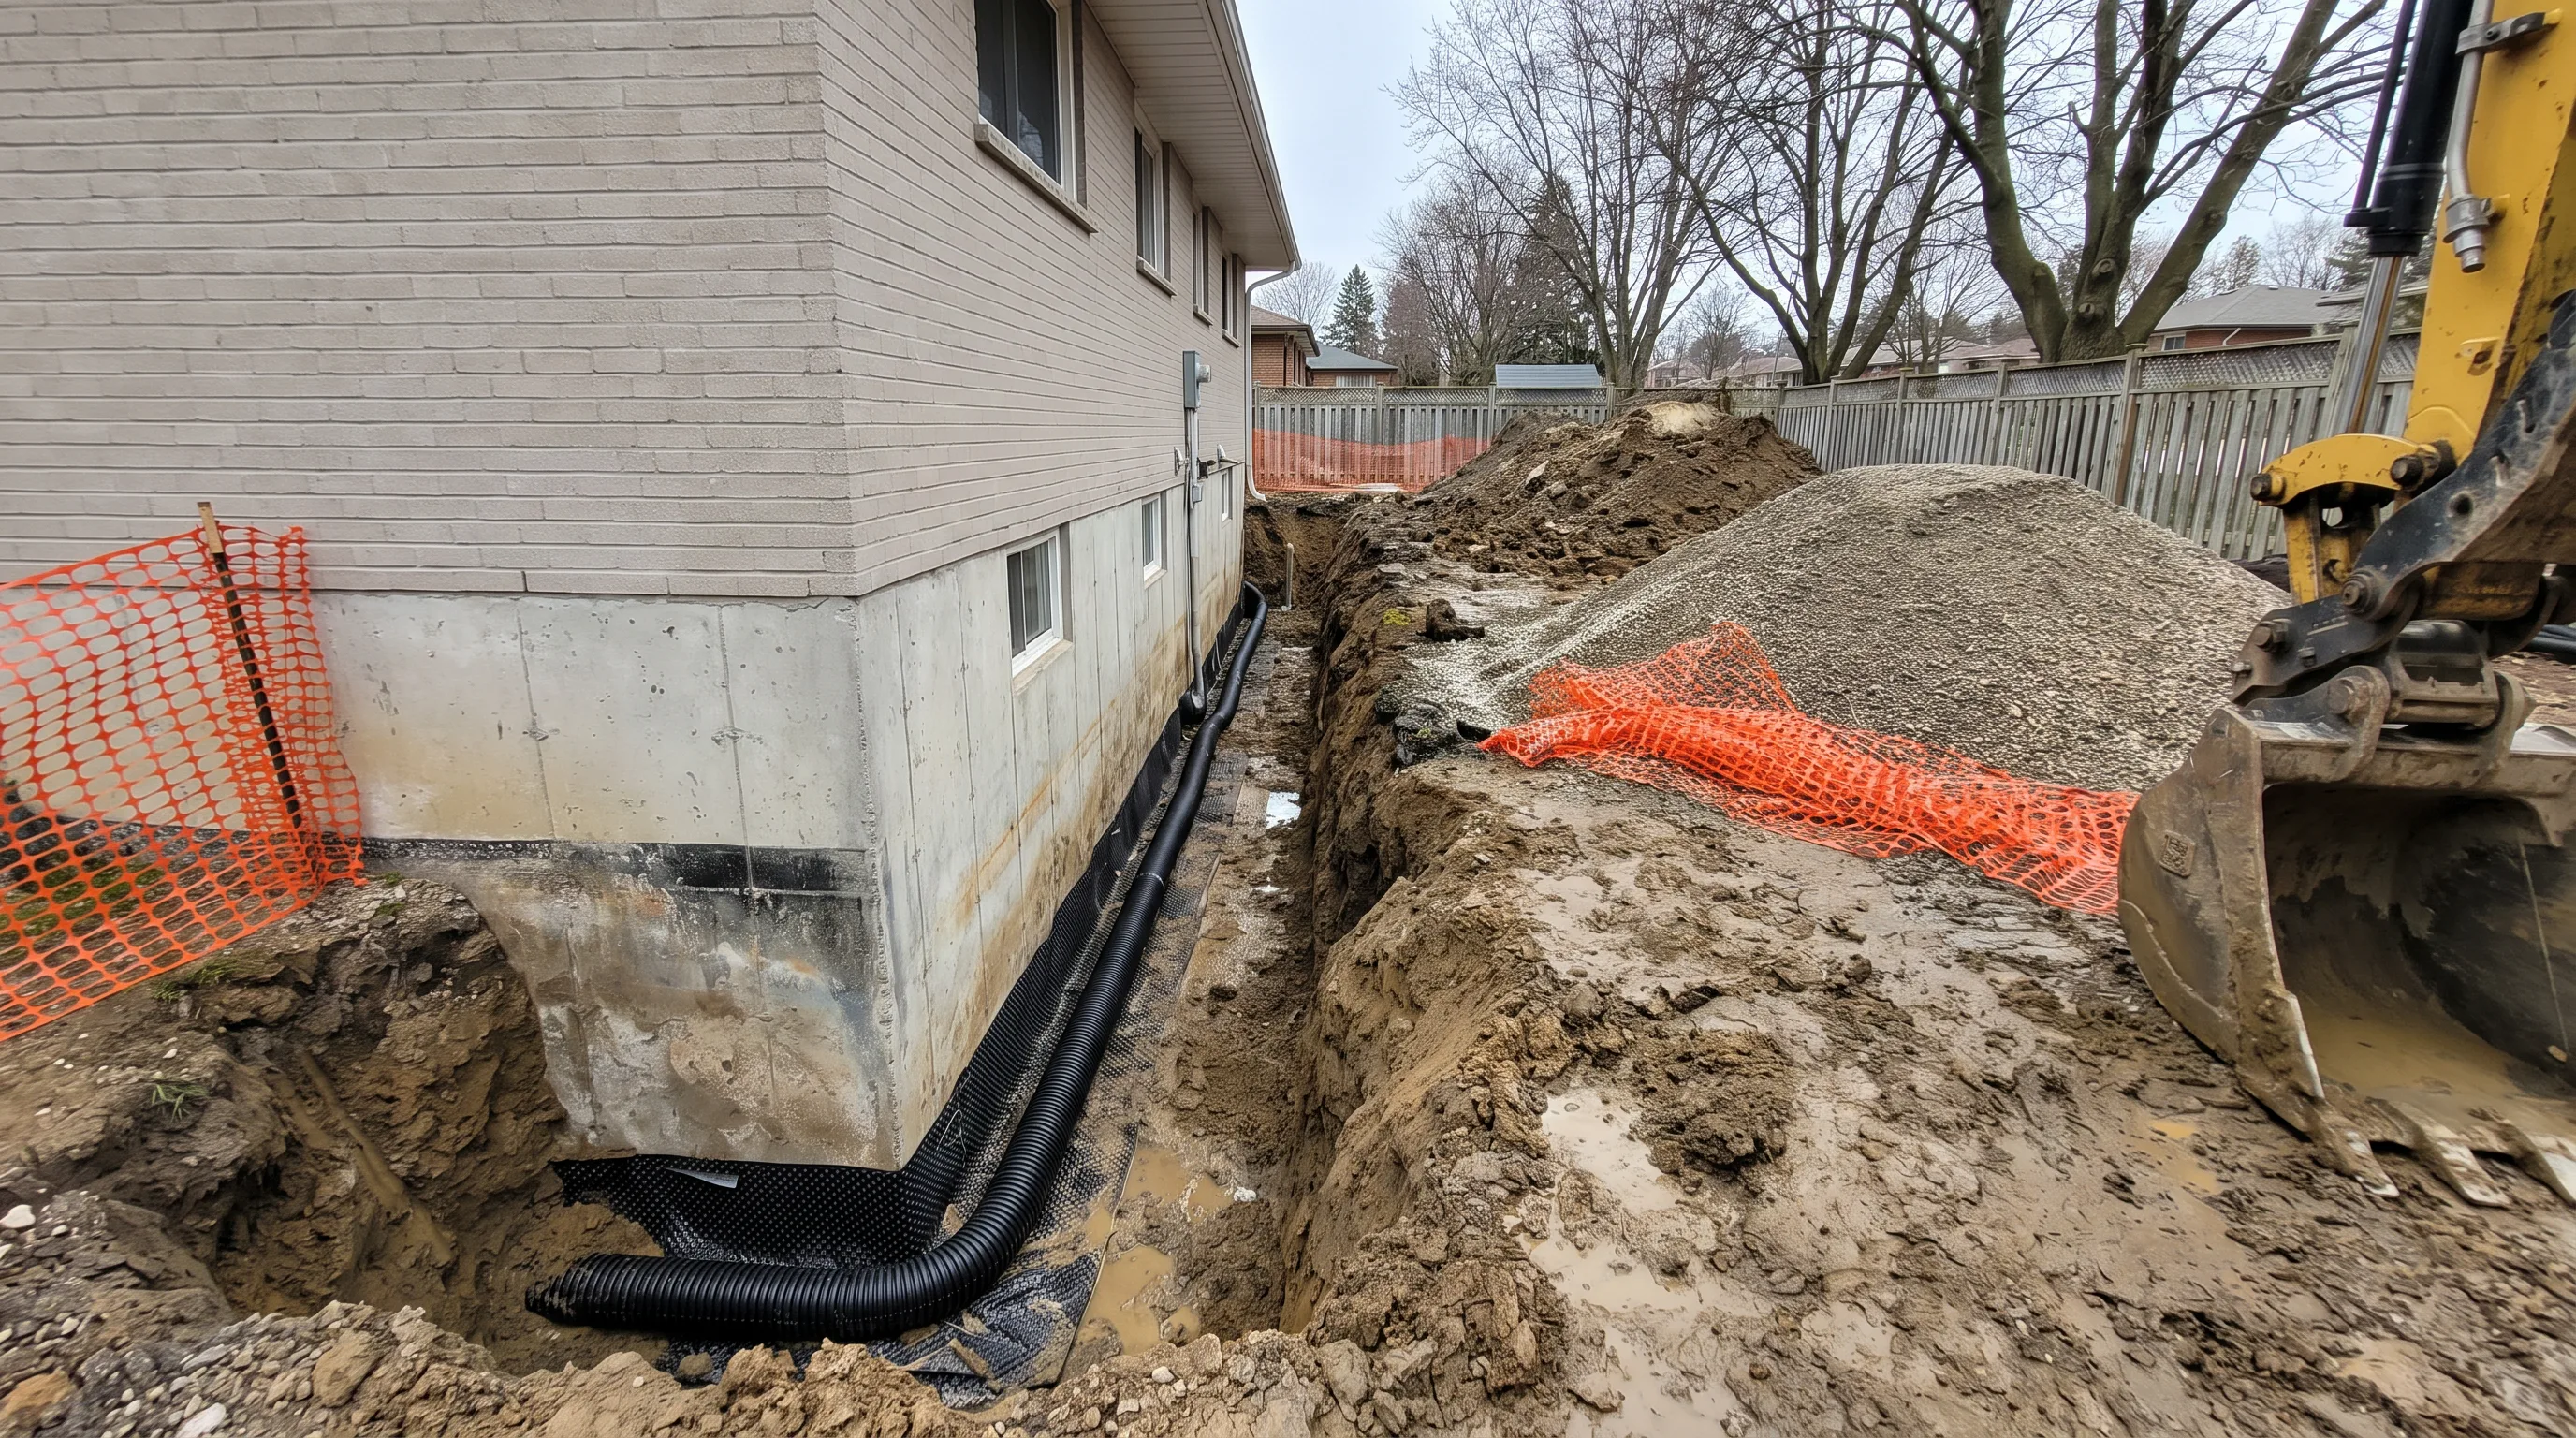
Full exterior waterproofing along the affected 15-foot section: excavation to the footing, a new crystalline membrane, a drainage board, and new weeping tile tied into a repositioned discharge point.
The Work
Excavation exposed the full footing along the affected wall section, revealing two hairline cracks not visible from the interior side - cracks that would have gone unaddressed under an interior-only approach. Both were sealed as part of the same scope before the membrane was applied. New weeping tile was installed at the footing level and tied into a discharge point routed well away from the foundation, correcting the original tile's failure point.
The Result
- Zero water intrusion through two full rainy seasons since completion
- Two previously undetected foundation cracks identified and sealed as part of the same project
- Grading corrected along the affected section to direct surface water away from the wall going forward
- 10-year warranty on the completed system
This project is a good example of why diagnosis has to come before method selection - an interior system would have been the lower-cost, lower-disruption choice on paper, but it wouldn't have caught the failed weeping tile or the hidden wall cracks driving the actual problem. For method and pricing details, see our basement waterproofing service page.
Frequently Asked Questions
Because the diagnostic assessment found a failed original weeping tile and grading issues actively pushing water against the wall - problems an interior drainage system manages after the fact rather than solving at the source. Exterior work was the fix that matched the actual cause.
The affected section was backfilled and the surface restored as part of the project scope; full landscaping restoration is typically discussed and quoted as part of the original estimate when a client wants more than basic backfill.
From the initial assessment to the finished, inspected system, the project ran just under three weeks - most of that excavation, membrane curing, and new tile installation along the affected section.