A century home in Kirkendall came to us with a horizontal crack running along the basement wall, damp to the touch after every heavy rain. The homeowners had watched it for a year, hoping it was nothing, until a neighbour's similar-looking crack turned out to be a bowing wall. This is a walkthrough of that project, from the first inspection to the finished repair, including the decisions and small details that shaped how it actually played out.
The Problem
The crack ran roughly horizontal along the foundation wall's midpoint, about 14 feet long, with a small but measurable lateral offset - the telltale sign that soil pressure was actively bending the wall rather than a simple shrinkage crack settling harmlessly in place. Moisture was present along most of the crack's length, worse after heavy rain, with early efflorescence staining visible nearby.
The house itself was built in the early 1900s, with a fieldstone-and-poured-concrete hybrid foundation typical of Kirkendall's older housing stock. That combination is common in the neighbourhood, and it behaves differently under pressure than a modern poured foundation - the poured concrete sections tend to crack in predictable, repairable ways, which is exactly what had happened here rather than anything involving the older, more unpredictable fieldstone portions of the wall lower down near the footings.
Why this wasn't a simple injection job: horizontal cracks with lateral offset always warrant a structural assessment first - injecting the crack alone would have sealed the water but done nothing about the ongoing lateral pressure actively bending the wall further over time.
The Structural Assessment
A project manager measured the offset, checked the wall for bowing along its full height, and reviewed the exterior grading and downspout placement contributing to the hydrostatic pressure. The wall hadn't bowed enough to need full underpinning or wall anchors, but the crack and the pressure behind it needed more than injection alone to keep it from reopening or worsening over time.
The offset measured just under 6mm - enough to confirm real structural movement, but well short of the range where we'd recommend wall anchors or underpinning. That distinction mattered a great deal for the homeowners' budget: catching it at this stage kept the repair in the thousands rather than the tens of thousands a more advanced case, like the neighbour's, would have required.
Polyurethane Foam Injection
Low-pressure injection through ports along the full 14-foot crack length, sealing it from interior to exterior wall face and stopping the active water intrusion immediately.
Carbon Fibre Reinforcement
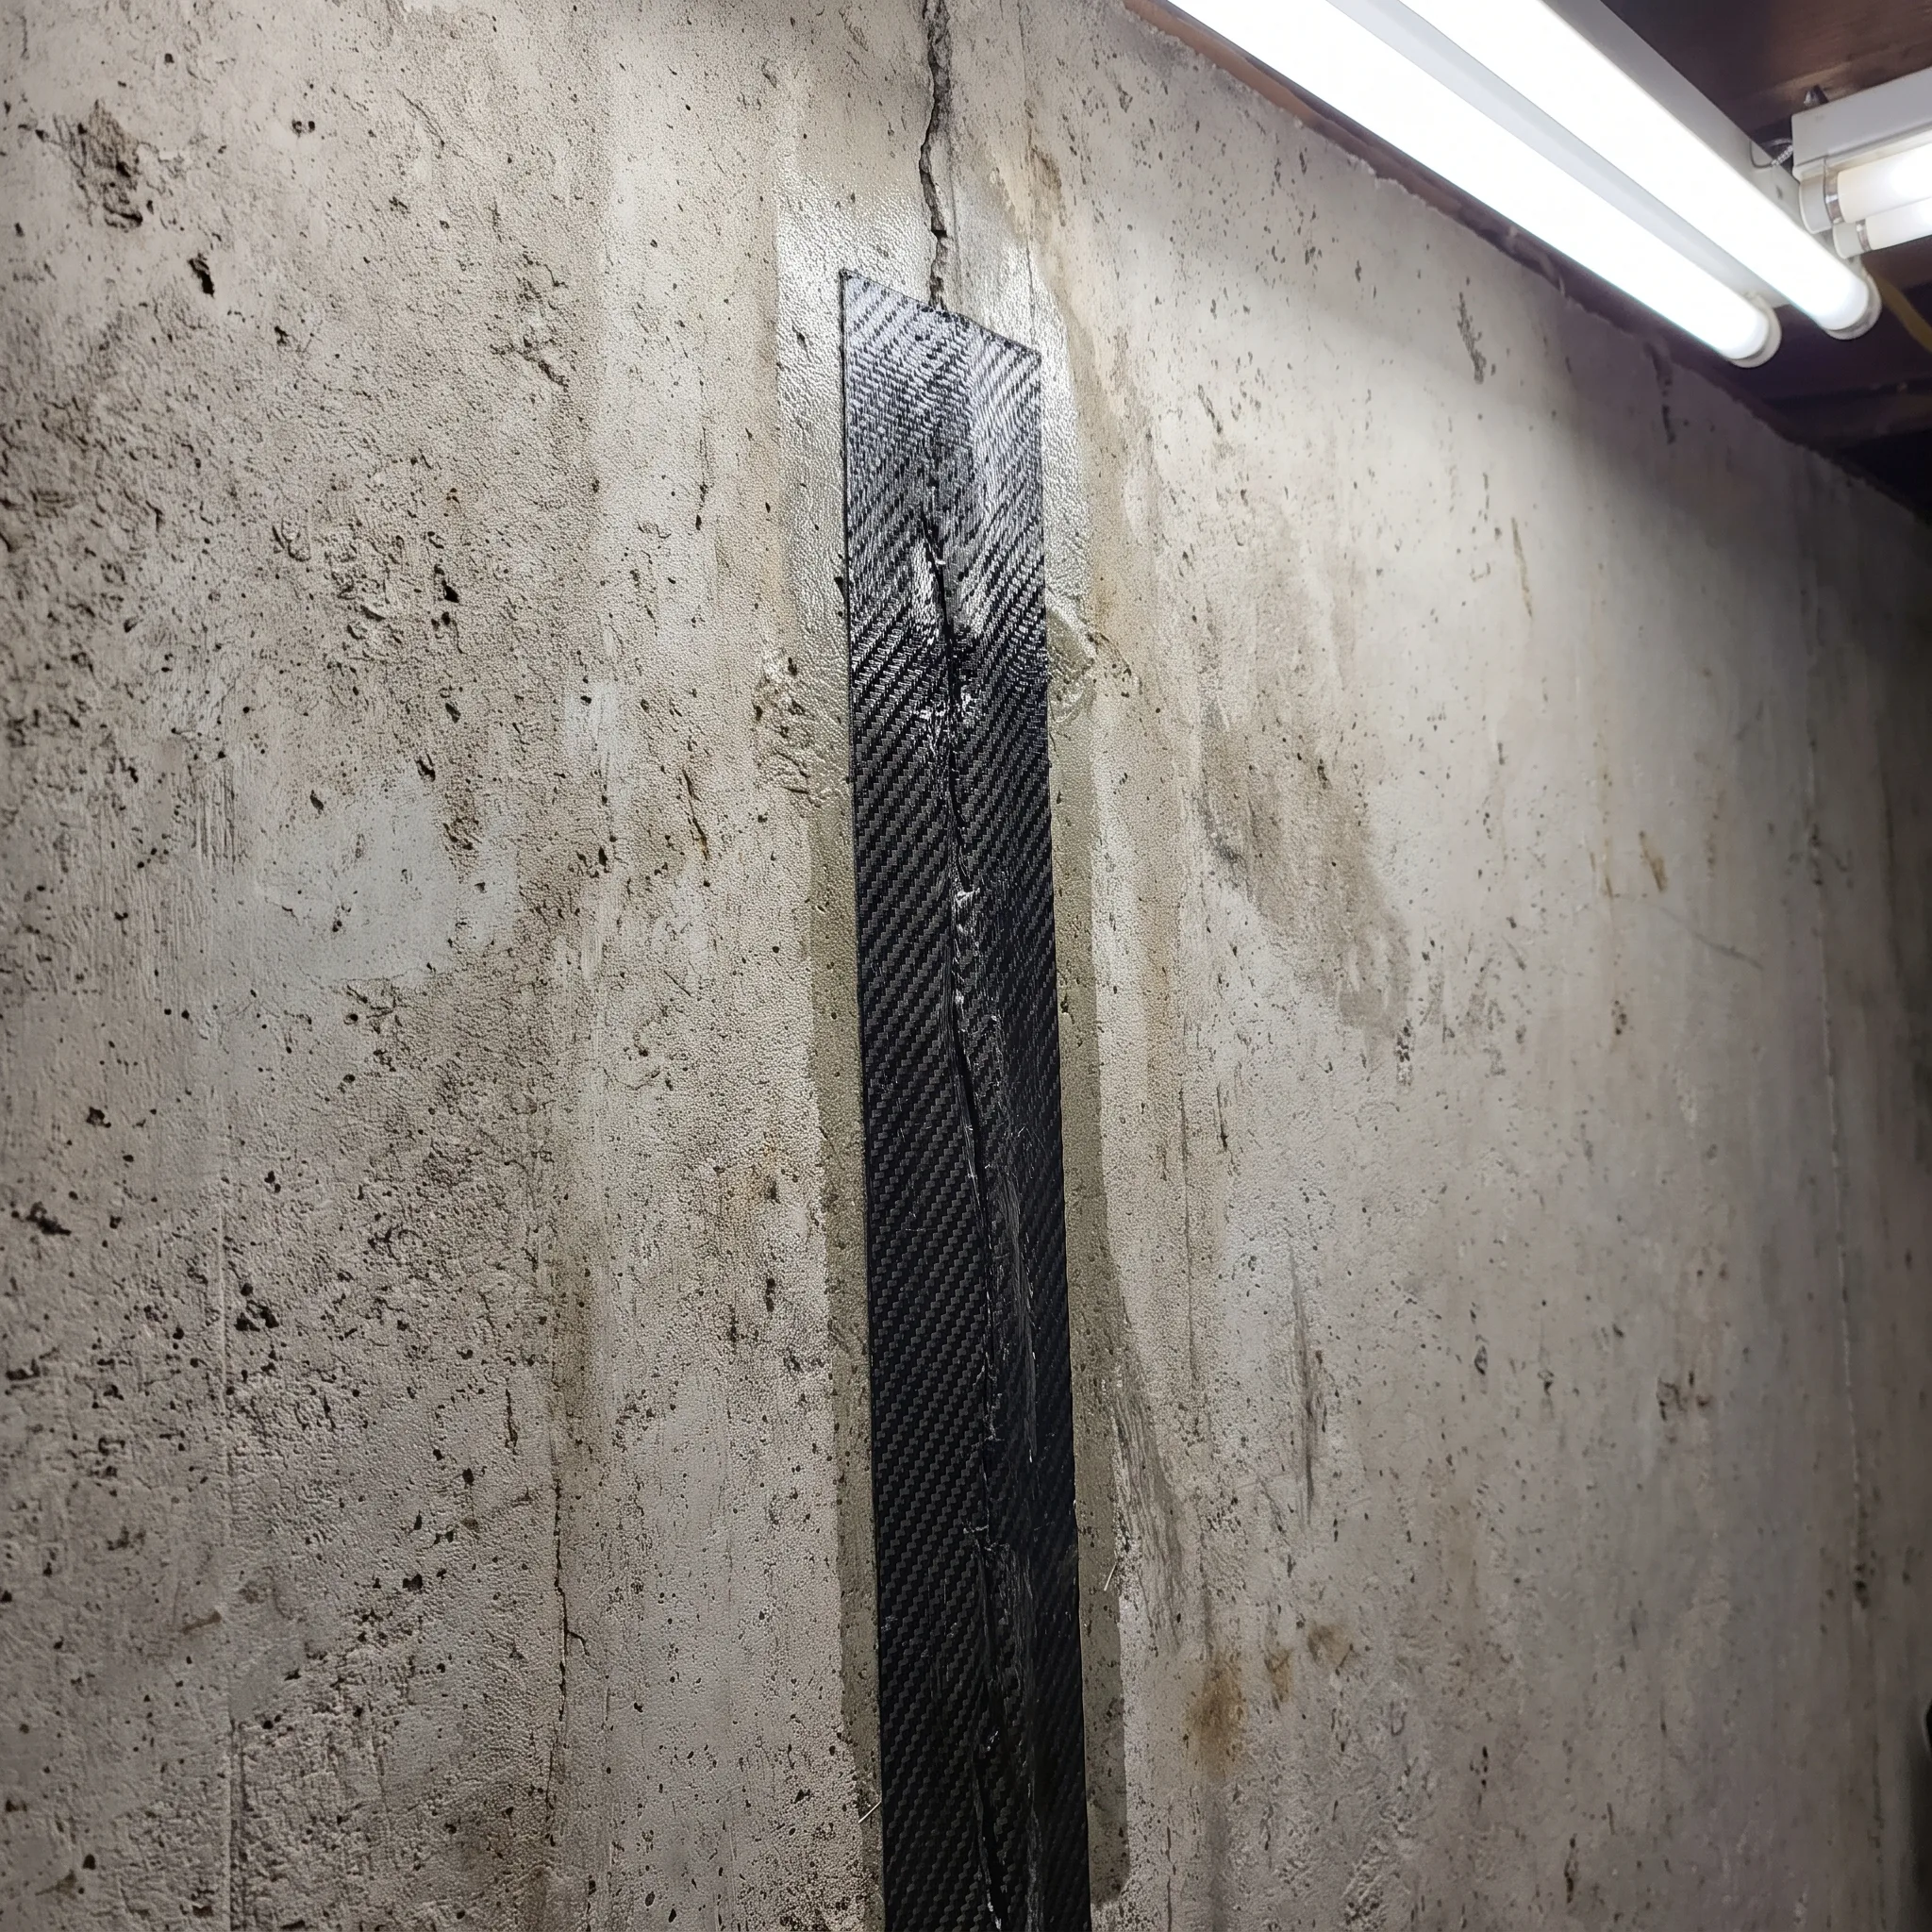
Carbon fibre straps bonded vertically across the crack at three points along its length, resisting further lateral movement without the cost or disruption of full underpinning work.
The Repair Process
The appointment ran about 6 hours from start to finish. Injection ports went in first along the crack, followed by surface sealing between them. The polyurethane foam was injected at low pressure, expanding and curing on contact with the moisture already present in the crack. Once cured, the wall surface was prepped and the carbon fibre straps were epoxy-bonded across the crack at the three points the assessment had identified as needing reinforcement. We also recommended extending the downspout on that side of the house to cut down on the hydrostatic pressure feeding the original problem.
One detail that mattered on this particular job: the basement was partially finished, with drywall covering roughly two feet of the wall on either side of the visible crack. Rather than assuming the damage stopped where the drywall started, we opened a small inspection section before starting the injection work to confirm the crack didn't extend further than what was visible behind the finished wall - it didn't, but skipping that step is exactly how a repair ends up incomplete on an older, partially finished basement like this one.
The Result
- The crack sealed and dry through the next two months of testing rain, including one significant fall storm
- Carbon fibre reinforcement in place at three points, resisting further lateral wall movement
- Downspout extension completed the same day, addressing the pressure source rather than just the symptom
- Total timeline: 2 days from first call to finished repair, most of it spent scheduling the assessment
- A written warranty on file covering both the injection seal and the carbon fibre bond
The homeowners now have a documented, warrantied repair instead of a crack they were quietly worrying about every time it rained, and the finished basement wall around it is untouched. For pricing and process details on a similar repair, see our basement crack repair service page, or read our full basement wall crack guide if you're still trying to figure out what your own crack means.
Why the Homeowners Waited a Year Before Calling
Like a lot of Kirkendall's century homes, this one had seen its share of small cracks over the decades, and the family had learned to live with a certain amount of basement quirkiness. The crack had actually been there for at least two years before it started showing moisture, and it was the moisture - not the crack itself - that finally prompted the call. In hindsight, the homeowners said they wished they'd had it looked at as soon as they first noticed it, since the wall had likely been under lateral pressure the entire time the crack sat dry and unaddressed. A dry crack isn't automatically a safe one to ignore.
Part of the hesitation, they told us afterward, was not wanting to hear that the fix would mean tearing out the finished section of their basement. That's a common and reasonable worry, and it's worth saying directly: most crack repairs, including this one, don't require removing finished drywall beyond a small inspection or access area that gets patched back afterward. The repair itself is far less invasive than most homeowners assume before they've had an actual assessment done, which is often the biggest single relief of the whole process.
What the Neighbour's Situation Revealed
The neighbour's crack that prompted the call turned out to be a more advanced case of the same underlying problem - years of unaddressed lateral pressure that had progressed to a visibly bowing wall requiring wall anchors, a far more invasive and expensive repair than carbon fibre alone. Comparing the two houses side by side made the timing lesson concrete: catching a horizontal crack with early-stage offset, like this Kirkendall home's, meant carbon fibre reinforcement was enough. Waiting the additional years the neighbour had waited turned the same underlying issue into a full wall-anchor project costing several times more.
Both homes back onto the same escarpment-adjacent grade, which likely means similar soil and drainage conditions drove both problems along a similar timeline. It's a pattern we see fairly often in older Hamilton neighbourhoods built along consistent grading - if one house on a street develops a lateral pressure crack, it's worth a homeowner two doors down at least getting a basement wall looked at, even without visible symptoms yet, simply because the underlying soil conditions rarely respect property lines or lot boundaries.
Ongoing Maintenance After the Repair
If you're seeing something similar on your own wall, our free assessment guide walks through what that first visit covers before you commit to anything.
Frequently Asked Questions
The crack was horizontal with visible lateral offset, both signs of lateral soil pressure bending the wall rather than simple shrinkage. Horizontal cracks always warrant a structural assessment before any repair method gets specified.
The injection sealed the crack against water, but it doesn't add strength back to a wall that has already bowed slightly under soil pressure. Carbon fibre straps were bonded across the crack to resist further lateral movement, addressing the structural cause alongside the water intrusion.
The initial assessment happened within two days of the call. Once the homeowners approved the fixed-price proposal, the polyurethane injection and carbon fibre installation were completed in a single appointment lasting about 6 hours.