A 1980s two-storey in Flamborough came to us with a kitchen and dining room split by a wall the homeowners were sure had to go. They wanted the classic open-concept layout - island, sightline to the living room, natural light carrying through from the back windows. This is a walkthrough of that project, from the first suspicion that the wall was load bearing to the finished steel beam overhead, including the decisions that shaped the final outcome along the way.
The Problem
The wall separating the kitchen from the dining room ran perpendicular to the second-floor joists and sat directly above a support post visible in the unfinished portion of the basement - both classic indicators of a load bearing wall. The homeowners had already been told by one contractor that it "looked fine to remove," with no engineer involved. That's exactly the kind of assumption that leads to problems, so before any demolition talk, we brought in our structural engineer of record to confirm what the wall was actually carrying, rather than proceeding on a hallway opinion from someone who hadn't inspected the framing at all.
The homeowners had lived with the closed-off layout for almost six years, hosting holidays in a dining room that always felt cut off from where everyone actually gathered. It was the kind of project they'd talked about since moving in, but held off on until they found a contractor willing to confirm the structural reality first instead of just quoting the demolition.
The finding: the wall was carrying roughly a third of the second floor's load down through that basement post. Removing it without a properly engineered beam would have left the second floor with nothing adequate underneath it.
Engineering the Replacement
The opening needed to span 17 feet to fully open the kitchen and dining room into one space. At that span, combined with the second-floor load, an LVL beam would have required a deeper beam pocket than the ceiling height comfortably allowed without dropping a visible bulkhead - something the homeowners specifically wanted to avoid. Our engineer specified a steel I-beam instead, which met the load requirement at a shallower profile and kept the finished ceiling flush with the rest of the main floor.
Engineering & Permits
Our structural engineer of record produced stamped drawings for the 17-foot steel beam span and two engineered posts. The City of Hamilton permit took just under 5 weeks to approve.
Temporary Support & Demolition
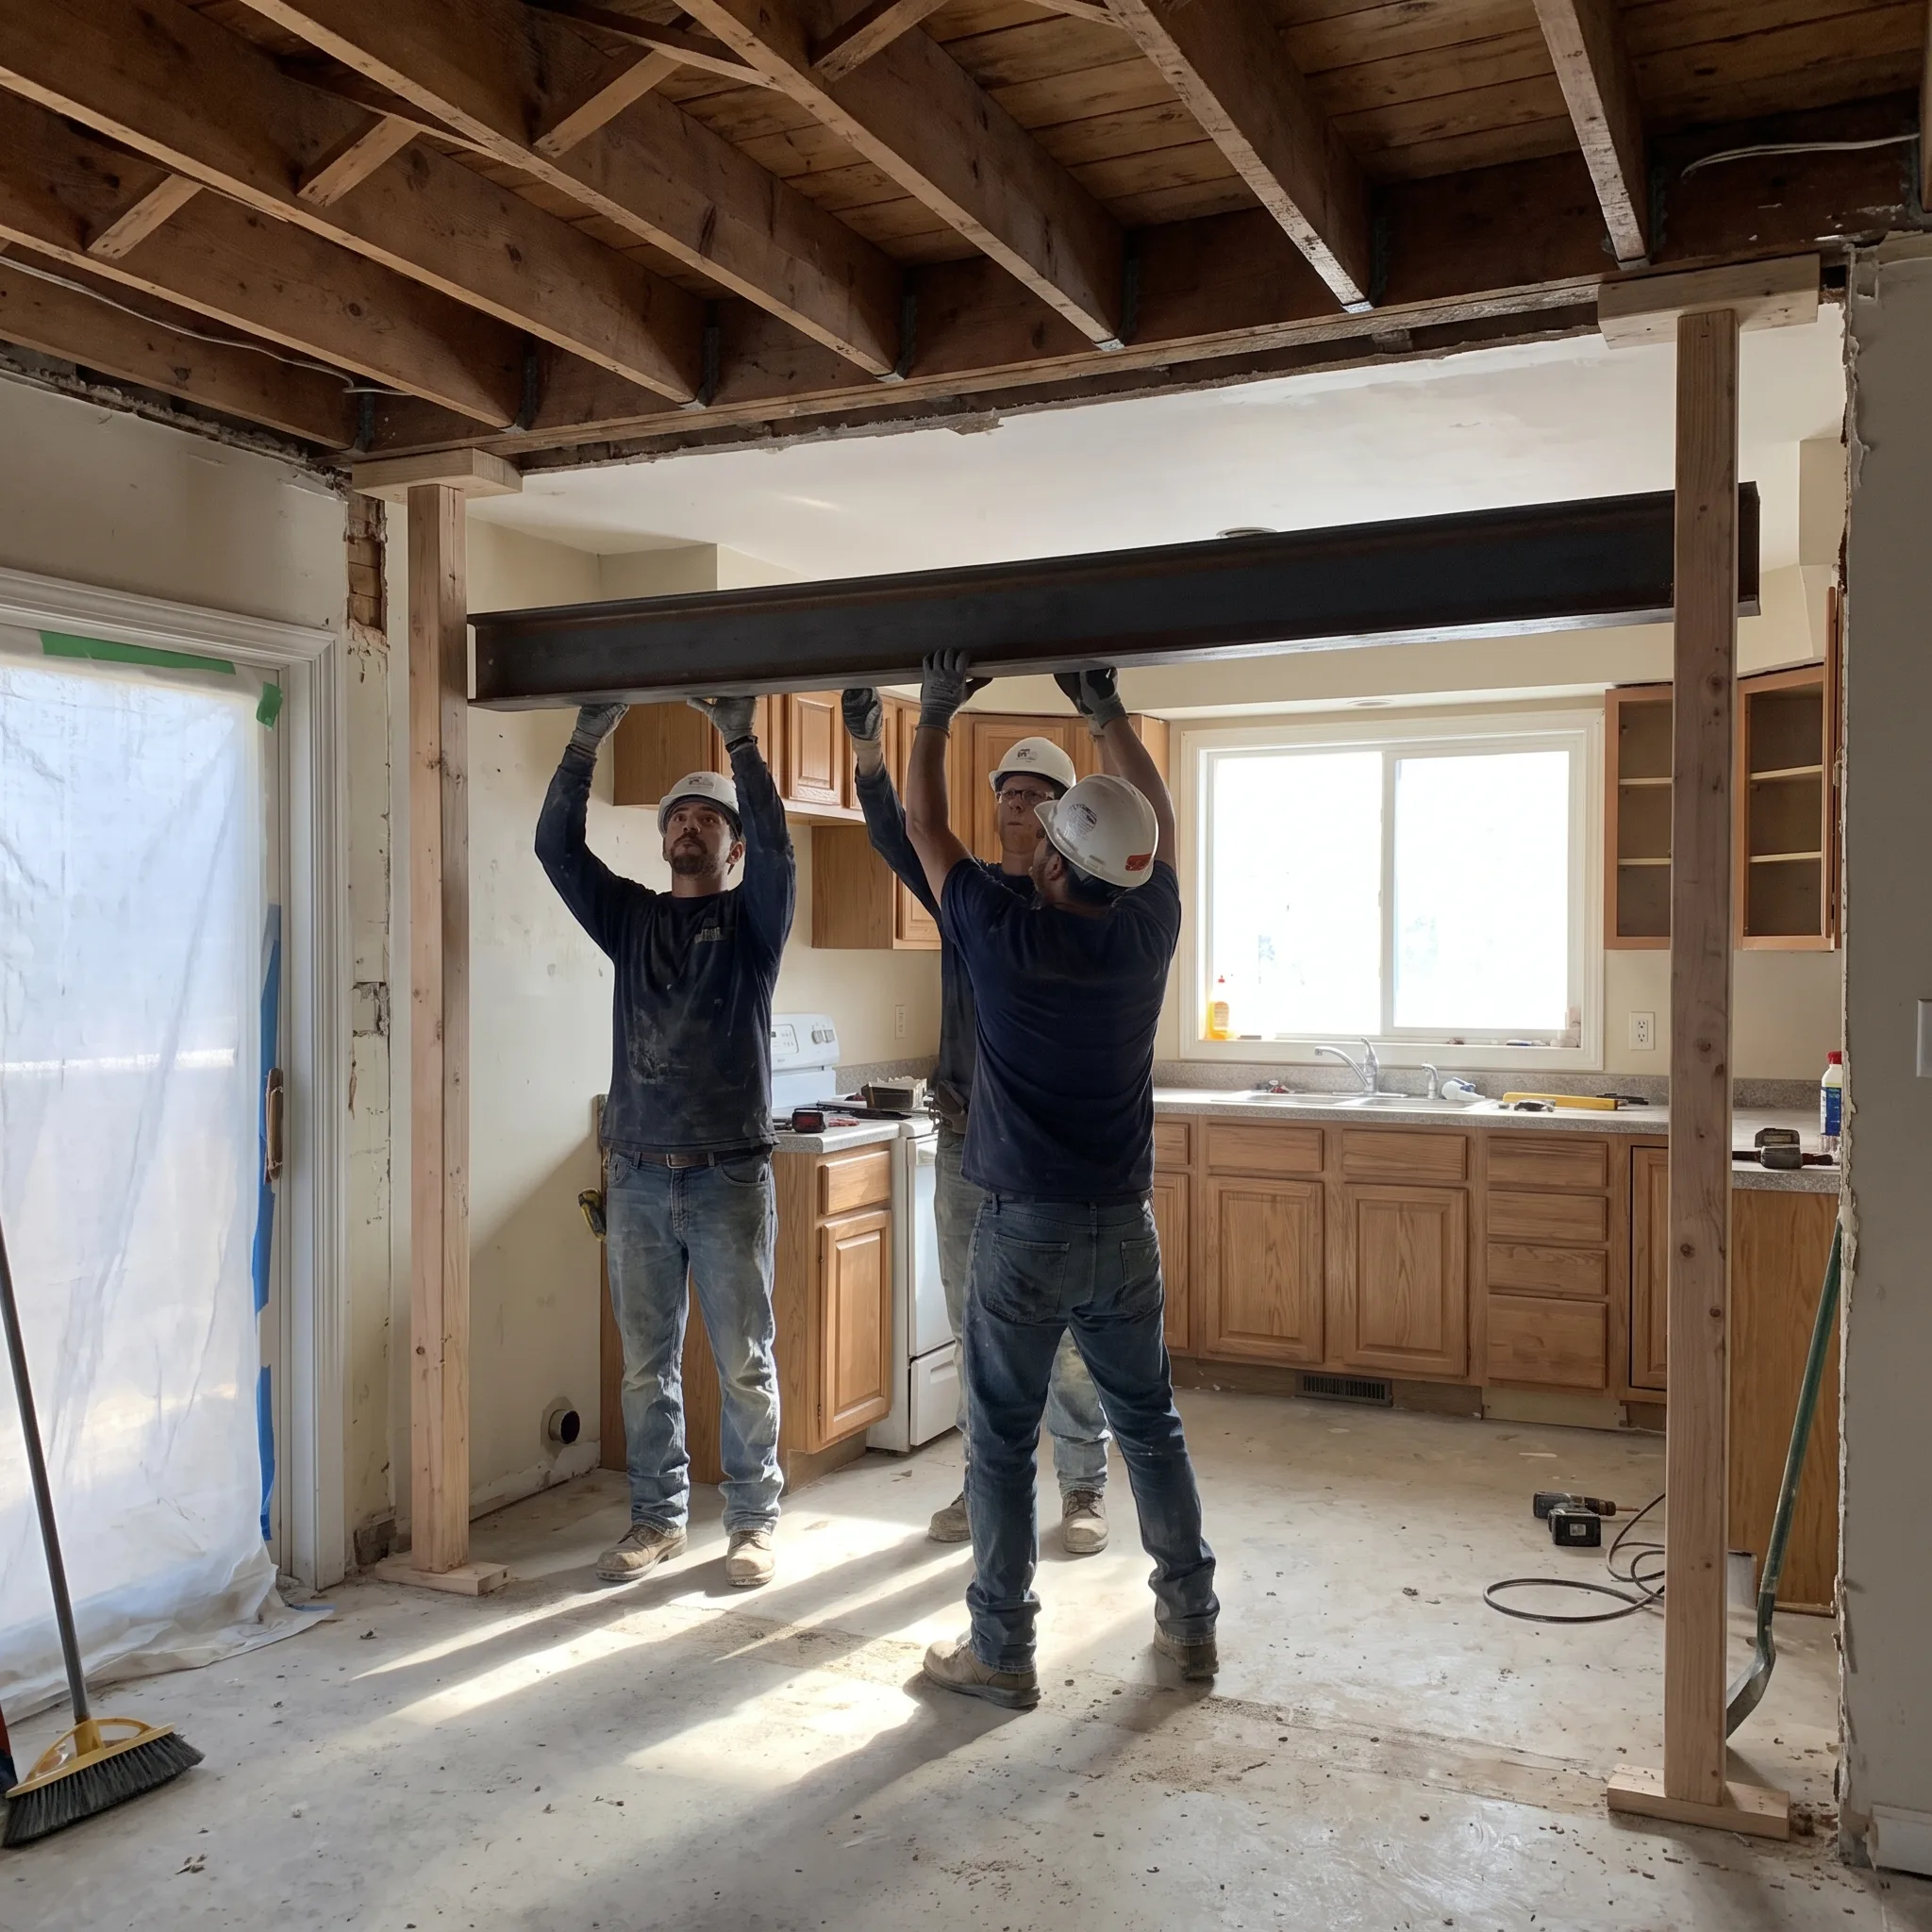
Temporary load-bearing walls went in on both sides of the opening before a single stud came out, keeping the second floor fully supported throughout demolition.
Wall Removal and Beam Installation
With the permit approved and temporary supports in place, the old wall came out in sections. The steel I-beam went up into the opening, seated on engineered posts at each end that carry the load down through the main floor to footings in the basement below. A City of Hamilton framing inspector confirmed the beam, post connections, and footing bearing all matched the approved drawings before any drywall closed the opening back up - a step we coordinated and attended ourselves so the homeowners never had to deal with City scheduling directly.
The Result
- A single 17-foot open span connecting the kitchen, dining room, and living sightline the homeowners wanted from the start
- A steel beam finished flush with the ceiling - no visible bulkhead anywhere in the new open space
- Closed City of Hamilton permit with a structural framing inspection on file
- Total timeline: just under 7 weeks from first call to finished opening, most of it spent waiting on permit approval
The finished kitchen island now sits exactly where the load bearing wall used to stand, with sightlines the family had been picturing since they bought the house. For pricing and process details on a project like this, see our load bearing wall removal service page, or read our full open-concept renovation guide if you're still at the planning stage.
Before and After: What Actually Changed
Before the project, the kitchen was a closed galley layout with a single doorway into the dining room - functional, but dark and disconnected from the rest of the main floor. The dining room got almost no natural light from the kitchen's window because the wall blocked the sightline entirely. After the beam went in, light from both the kitchen's south-facing window and the living room's bay window now carries across the entire main floor. The homeowners moved their island to sit roughly where the old doorway used to be, which turned out to be the natural gathering point once the wall was gone - something that's hard to picture accurately from a drawing until the space actually opens up.
A Day-by-Day Breakdown of the Physical Work
Day 1: Temporary Support & Prep
Temporary load-bearing walls went up on both sides of the opening, flooring and cabinetry near the work zone were protected, and dust barriers were sealed off from the rest of the main floor.
Day 2: Demolition
The existing wall came out in sections, exposing the framing above and confirming the load path matched the engineer's original assessment before the beam pocket was cut.
Day 3: Beam & Post Installation
The steel I-beam was lifted into place and secured to the engineered posts at each end, which were set down to footings extending into the basement floor slab.
Day 4: Inspection & Temporary Support Removal
The City framing inspector verified the beam, post connections, and bearing points against the approved drawings. Once signed off, the temporary walls came down and the opening was fully load-bearing on the new beam.
Why Flamborough Homeowners Choose an Engineered Approach
Flamborough's mix of 1970s-90s two-storey builds means a lot of homes in the area share a similar compartmentalized floor plan from when they were built - separate kitchen, dining, and living spaces closed off by walls that often turn out to be load bearing once an engineer actually looks at the framing. Homeowners in the area increasingly want the same open-concept feel newer builds come with standard, but without cutting corners on the structural side. The families we work with in Flamborough consistently prioritize getting the permit and engineering right the first time over saving a few weeks by skipping steps - largely because most of them plan to stay in the house long enough that a shortcut now would just become their own problem to fix later.
What This Project Meant for Resale Value
The homeowners weren't planning to sell, but they asked about resale impact during the initial consultation - a common question on any structural renovation. An open-concept main floor with a properly permitted and engineered beam is a straightforward asset at resale: the permit closes cleanly in city records, the framing inspection is on file, and a home inspector reviewing the house later has nothing to flag. Compare that to an unpermitted wall removal, which routinely surfaces during a buyer's inspection and forces a price renegotiation or a costly retrofit before closing. Doing the structural work properly the first time protects the renovation's value rather than just the immediate result.
Lessons for Other Flamborough Homeowners Considering This
Three things came up repeatedly during this project that apply to almost any similar Flamborough renovation. First, don't trust a visual opinion on load bearing status from anyone who isn't an engineer or an experienced contractor doing an actual framing inspection - the consequences of guessing wrong are too significant. Second, budget the permit timeline into your renovation schedule from the start; a 5-week wait feels long if you assumed demolition could start next week, but it's normal and unavoidable for structural permits in Hamilton. Third, ask about beam depth early if a flush ceiling matters to you - the choice between LVL and steel often comes down to exactly that constraint, and it's easier to plan around upfront than to discover mid-project. If you're at this stage yourself, our free assessment guide walks through what that first visit actually covers.
Frequently Asked Questions
The wall ran perpendicular to the second-floor joists and sat above a basement post, both signs it was likely load bearing. Rather than guess, the engineer confirmed it was carrying roughly a third of the second floor's load, which set the beam size and post configuration for the whole project.
The 17-foot span combined with the second-floor load exceeded what an LVL beam could carry at the available ceiling depth without dropping a bulkhead. A steel I-beam met the load requirement within a shallower profile, keeping the finished ceiling flush.
The City of Hamilton permit took just under 5 weeks to approve. Once issued, temporary support, wall removal, beam and post installation, and the framing inspection were completed in 4 working days.